
30-Day Calisthenics Workout Plan for Beginners
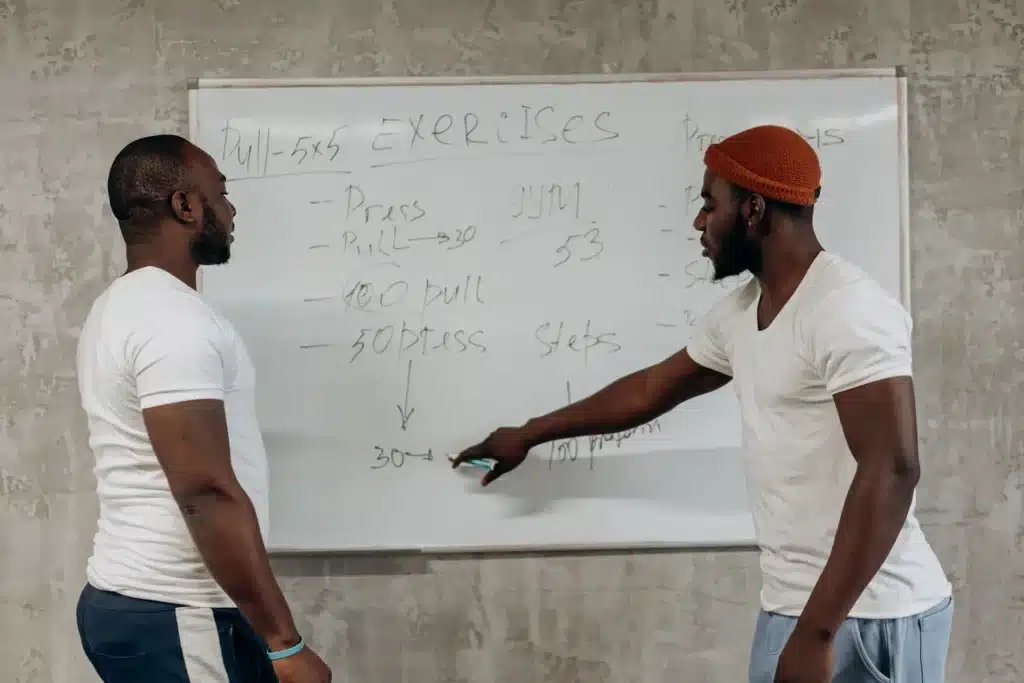
A useful beginner plan should tell you what to do without pretending that every beginner has the same starting strength.
This 30-day calisthenics workout plan for beginners uses three main workouts per week. Workout A emphasizes pushing and squatting, Workout B emphasizes pulling and the posterior chain, and Workout C repeats the main movement patterns at a slightly lower training demand.
The calendar remains fixed, but your exercise variation, repetitions, and daily workload can change. That allows an absolute beginner, a returning trainee, and someone who already has basic exercise experience to follow the same structure without being forced into the same exercise level.
This 30-day calisthenics workout plan can be completed at home with floor space, a wall, and a stable raised surface. A stable low bar, pull-up bar, resistance band, or parallel bars can improve your pulling and arm-training options, but they are not required to begin.
This is a progressive beginner workout plan, not a daily-repetition challenge. You will not perform 30 consecutive hard workouts, and no jumping or burpees are required in the default plan.
30-Day Plan at a Glance
Quick answer: Complete three main calisthenics workouts per week, keep an easier or rest day between most strength sessions, and use a variation that allows controlled repetitions without reaching technical failure.
| Plan Feature | Default Arrangement |
|---|---|
| Experience Level | Absolute beginners, newer trainees, and returning beginners |
| Length | 30 days |
| Main Workouts | Three per week |
| Workout Templates | Workout A, B, and C |
| Exercises per Workout | Five |
| Full-Session Length | About 20–30 minutes |
| Minimum Session | About 10–15 minutes |
| Equipment | No gym equipment required |
| Optional Equipment | Stable low bar, pull-up bar, resistance band, or parallel bars |
| Effort | Finish most sets with about 2–3 controlled repetitions left |
| Final Task | Repeat your starting checks on Day 30 |
Although this is a 30-day bodyweight workout plan for beginners, optional bars or bands can provide more useful pulling progressions.
This is not a promise that 30 days will produce a dramatic physical transformation. It is a structured first month designed to improve movement familiarity, controlled repetitions, consistency, and your ability to choose an appropriate exercise level.
Who This Plan Is For
Absolute Beginners
Absolute beginners can use this calisthenics workout plan by starting with Wall Push-Ups, Sit-to-Stand, and the easiest controlled version of each movement pattern.
You do not need to complete a Standard Push-Up, Pull-Up, full-depth Squat, or advanced core exercise before beginning.
Trained but New to Calisthenics
Previous gym or sports experience may give you useful strength, but it does not automatically determine your calisthenics level.
You may begin with a more difficult leg exercise while still needing an elevated Push-Up or assisted pulling variation. Test each movement pattern separately rather than assigning your entire body one level.
Returning Beginners
If you are returning after a long break, do not begin from your old training log automatically.
Previous practice may help you regain an ability faster, but your current exercise version should still be based on the repetitions and movement quality you can demonstrate now.
Exercise versions should be selected according to current ability, leverage, body weight, training history, and recovery—not sex alone. Age and body size can influence how difficult a bodyweight movement feels, but they do not require separate copies of the entire plan.
Before You Begin the 30-Day Plan
Complete a Short Starting-Level Check
This is not a maximum-effort test. Its purpose is to identify a manageable first version.
Rest briefly between the following checks.
1. Push Check
Try five controlled Wall Push-Ups.
- If they are difficult, begin there.
- If they are easy, test five Push-Ups against a high, stable surface.
- Lower the surface only while you can keep a stable body position and controlled range.
You do not need to test a Standard Push-Up if the elevated version is already challenging.
2. Leg Check
Perform eight controlled Sit-to-Stand repetitions from a stable chair.
- Begin with a higher surface or light hand support if needed.
- Use Sit-to-Stand in Workout A if eight repetitions are challenging.
- Consider Bodyweight Squats only if the chair version is stable and controlled.
3. Posterior-Chain Check
Perform eight Two-Leg Glute Bridges.
Choose a comfortable range that lets you lift without forcing the lower back into an exaggerated arch.
4. Core Check
Perform five Dead Bug repetitions per side.
Shorten the arm or leg reach if your torso position changes before the target is complete.
5. Pull or Back-Control Check
Without pulling equipment, perform eight controlled Prone Towel Pulldowns.
If you have a safe low bar, begin with a high-body-angle Australian Row. If you have a pull-up bar, test only a Supported Hang or Foot-Assisted Pulling variation unless you already have reliable pulling experience.
Record the version used for each check. Your Push, Pull, Legs, and Core levels do not need to match.
What You Need
The base plan can be completed with:
- a clear floor area;
- a wall;
- a stable chair or raised surface;
- enough room to lie down and extend your arms and legs.
Optional equipment can improve the plan:
- a stable low bar provides Australian Row variations;
- a pull-up bar provides hanging and assisted vertical-pull progressions;
- a resistance band can provide assistance;
- parallel bars provide supported Dip progressions.
“At home” and “no equipment” are not always identical. A floor-based back exercise can help you practise shoulder and upper-back control, but it does not reproduce the resistance provided by a safe Row or Pull-Up setup.
Do not improvise pulling exercises from an unstable table, loose door, lightweight chair, or structure that was not designed to support your body weight.
Warm Up Before Each Main Workout
Spend approximately five to seven minutes moving from general activity to movements that resemble the session ahead.
A practical warm-up can include:
- easy whole-body movement;
- controlled dynamic preparation for the shoulders, hips, and ankles;
- one simple rehearsal of the first exercise in the workout.
The warm-up should leave you more prepared, not tired before the first working set.
Related guide
Follow a 5–7 minute calisthenics warm-up for beginners at home. Choose full-body, upper-body, or lower-body routines with no equipment or jumping.
The Three Workouts in This Plan
This is not a traditional Push/Pull/Legs split.
A traditional three-day PPL schedule would expose each main movement category only once per week. Instead, this plan uses three full-body emphasis workouts. Each workout has a priority, but the main movement patterns appear more than once across the week.
Workout A: Push and Squat Emphasis
| Order | Movement | Default Exercise | Sets and Reps | Easier Option | Rest | Effort Target |
|---|---|---|---|---|---|---|
| 1 | Push | Incline Push-Up | 2–3 × 6–10 | Wall Push-Up or higher surface | 60–120 sec | Stop with 2–3 controlled reps left |
| 2 | Squat | Sit-to-Stand | 2–3 × 8–12 | Higher seat or light hand support | 60–120 sec | Stable depth without dropping onto the seat |
| 3 | Pull/back | Prone Towel Pulldown | 2–3 × 8–12 | Shorter reach and lighter effort | 60–90 sec | Controlled shoulder and upper-back movement |
| 4 | Posterior Chain | Two-Leg Glute Bridge | 2–3 × 8–12 | Shorter controlled range | 60–90 sec | Stop before the lower back compensates |
| 5 | Core | Dead Bug | 2 × 6–10 per side | Shorter arm or leg lever | 45–75 sec | Torso remains controlled |
If you have a safe low bar, an appropriate Australian Row can replace the Prone Towel Pulldown. Use a high bar position or bent knees to reduce difficulty.
The first three exercises form the Minimum Session when time is limited.
Workout B: Pull and Posterior-Chain Emphasis
| Order | Movement | Default Exercise | Sets and Reps | Easier Option | Rest | Effort Target |
|---|---|---|---|---|---|---|
| 1 | Pull/back | Prone Towel Pulldown | 2–3 × 8–12 | Shorter reach and lighter effort | 60–90 sec | Smooth back-control repetitions |
| 2 | Single-leg | Supported Reverse Lunge | 2–3 × 6–10 per side | Reduced range or supported split stance | 60–120 sec | Stable balance and controlled front knee |
| 3 | Push/arms | Narrow Incline Push-Up | 2 × 6–10 | Higher surface or standard-width hands | 60–120 sec | Stop before the body position changes |
| 4 | Posterior chain | Supine Back Extension | 2–3 × 8–12 | Shorter range or brief controlled hold | 60–90 sec | No forced lower-back range |
| 5 | Core | Reverse Crunch | 2 × 8–12 | Bent-knee heel tap or Dead Bug | 45–75 sec | Controlled pelvis without swinging |
With a safe low bar or pull-up bar, an Australian Row or Foot-Assisted Chin-Up can replace the first exercise.
A Foot-Assisted Dip may replace the Narrow Incline Push-Up when stable parallel bars are available. It replaces the Push/Arms slot rather than adding more working sets.
The first three exercises form the Minimum Session.
Workout C: Full-Body Practice
| Order | Movement | Exercise | Sets and Reps | Easier Option | Rest | Effort Target |
|---|---|---|---|---|---|---|
| 1 | Push | Current controlled Push-Up variation | 2 × 6–10 | Raise the hand position | 60–90 sec | Finish farther from fatigue than Workout A |
| 2 | Legs | Current Squat or Reverse Lunge variation | 2 × 8–12 | Sit-to-Stand or supported range | 60–90 sec | Consistent depth and balance |
| 3 | Pull/back | Current Pull or back-control variation | 2 × 6–12 | More support or shorter controlled range | 60–90 sec | No momentum or unsafe setup |
| 4 | Posterior chain | Glute Bridge | 2 × 8–12 | Two-leg version with shorter range | 45–75 sec | Controlled hip movement |
| 5 | Core | Knee Side Plank | 2 × 15–25 sec per side | Shorter hold or higher support | 45–75 sec | Stop before the torso rotates |
Workout C is not intended to become a third high-fatigue session. Its purpose is to provide another exposure to the main patterns, improve technique, and show whether the variations selected for Workouts A and B remain appropriate.
How Hard Should Each Set Feel?
Most sets should finish with approximately two or three controlled repetitions left.
This does not mean you must predict your repetitions in reserve perfectly. It is a practical limit intended to stop a beginner session from turning into repeated failure training.
Stop the set if the next repetition would require you to:
- shorten the range substantially;
- change the intended body position;
- bounce or use momentum;
- lose control of the lowering phase;
- change the exercise into a different movement.
A systematic review and meta-analysis found that training to muscular failure was not required for strength or muscle-size gains across the included studies. The studies involved different populations and programs, so they do not validate an exact “two or three repetitions left” rule for this plan. They support the narrower point that every working set does not need to end at failure. Review the resistance-training-to-failure meta-analysis.
Your 30-Day Calisthenics Calendar
The beginner calisthenics workout calendar below separates strength sessions, active recovery, and complete rest instead of treating all 30 days as hard workouts.
The calendar keeps the training order fixed while allowing your exercise versions to change.
| Day | Plan | Main Purpose | Completed | Notes |
|---|---|---|---|---|
| 1 | Workout A | Learn the movements and record starting versions | □ | |
| 2 | Active Recovery | Easy walking or mobility | □ | |
| 3 | Workout B | Learn the movements | □ | |
| 4 | Rest | No formal strength training | □ | |
| 5 | Workout C | Low-fatigue full-body practice | □ | |
| 6 | Active Recovery or Rest | Choose according to readiness | □ | |
| 7 | Rest | Prepare for Week 2 | □ | |
| 8 | Workout A | Repeat with better control | □ | |
| 9 | Active Recovery | Easy movement | □ | |
| 10 | Workout B | Repeat with better control | □ | |
| 11 | Rest | Recovery | □ | |
| 12 | Workout C | Practise the main patterns | □ | |
| 13 | Active Recovery or Rest | Keep the effort low | □ | |
| 14 | Rest | Review Week 2 | □ | |
| 15 | Workout A | Add one small progression if earned | □ | |
| 16 | Active Recovery | Easy movement | □ | |
| 17 | Workout B | Add one small progression if earned | □ | |
| 18 | Rest | Recovery | □ | |
| 19 | Workout C | Confirm the new or existing versions | □ | |
| 20 | Active Recovery or Rest | Avoid adding another hard workout | □ | |
| 21 | Rest | Review Week 3 | □ | |
| 22 | Workout A | Consolidate | □ | |
| 23 | Active Recovery | Easy movement | □ | |
| 24 | Workout B | Consolidate | □ | |
| 25 | Rest | Recovery | □ | |
| 26 | Workout C | Complete the final normal training session | □ | |
| 27 | Active Recovery or Rest | Reduce fatigue | □ | |
| 28 | Rest | Prepare for the final check | □ | |
| 29 | Rest or very light activity | Recheck the testing setup | □ | |
| 30 | Final Assessment | Repeat the Day 1 checks | □ |
Days 1–7: Learn
The first week is not a test of how much fatigue you can tolerate.
Use it to:
- select exercise versions;
- learn the workout order;
- find an appropriate range of motion;
- record your starting repetitions;
- identify equipment limitations.
Do not upgrade an exercise during the first session just because the first set felt easy. Complete the planned work and evaluate the entire session.
Days 8–14: Repeat
Keep most exercise versions unchanged.
Look for:
- cleaner repetitions;
- more consistent depth or range;
- less unnecessary movement;
- better pacing between sets;
- fewer changes to your setup.
An exercise does not need to change every week for the training to remain useful.
Days 15–21: Build
Change only one main variable at a time:
- add a small number of repetitions;
- add one working set where the table permits it;
- or move to a slightly harder variation.
Do not increase repetitions, sets, and exercise difficulty simultaneously.
Days 22–28: Consolidate
Use the final normal training week to confirm what you have built.
Avoid creating artificial Day 30 improvements by sharply increasing training volume, repeatedly testing maximum repetitions, or replacing several exercises just before the final assessment.
Days 29–30: Prepare and Recheck
Day 29 should not create meaningful fatigue.
On Day 30, repeat the same selected checks you recorded on Day 1. Keep the movements, order, rest periods, and range-of-motion standards as similar as practical.
Why This Plan Uses Three Main Training Days
Three workouts per week are used as a practical starting structure, not as a universal requirement.
Two days can still be useful when time or recovery is limited. Four days may also work, but the weekly workload should be divided rather than copying all three workouts and adding another full session.
General exercise guidance from the American College of Sports Medicine has recommended resistance exercise for the major muscle groups on two or three days per week. That recommendation supports the broad frequency range, but it does not prove that this exact A/B/C calendar is optimal for every beginner. Read the ACSM guidance indexed by PubMed.
Other activity also counts. Running, sports, gym training, and demanding calisthenics skill practice can all affect how much work you can recover from.
Related guide
Most beginners can do calisthenics 2–4 days a week. Learn when to choose two, three or four days—and when to keep, add or reduce a training day.
How to Progress Through the 30 Days
A progression chart can show what comes next, but it cannot decide when you are ready. Use four possible decisions: Progress, Hold, Regress, or Bridge.
Progress
Consider a harder variation or a small increase only when:
- you complete all planned sets;
- you reach the top of the repetition range;
- the intended range of motion remains consistent;
- your speed and control do not collapse near the end;
- you do not use obvious compensation;
- you repeat that performance during at least two sessions.
One successful set is useful information, but it is not enough by itself.
Hold
Keep the same variation when:
- you complete the planned work but remain close to your limit;
- the final repetitions slow down without losing form;
- the movement still provides an appropriate challenge;
- your performance is stable but not yet ready for progression.
Holding a level is not the same as making no progress. Stable, repeatable performance makes a later progression more reliable.
Regress
Use an easier variation or reduce the workload when:
- you cannot reach the bottom of the repetition range;
- your range of motion repeatedly shortens;
- you need momentum or obvious compensation;
- your performance has declined across several exercises;
- you are returning after illness or a longer break;
- the current variation no longer looks like the intended movement.
Regressing for one session does not erase the ability you previously developed.
Bridge the Gap
Sometimes the current exercise becomes easy while the next named variation is still too difficult.
Instead of forcing the harder movement, create a smaller step by:
- changing the body angle;
- adding hand or foot support;
- reducing assistance gradually;
- beginning with a controlled partial range;
- using a slow lowering phase;
- adding a short pause;
- choosing an intermediate setup.
Optional Pull-Up and Dip Progressions
If you have safe equipment, use these as direction maps rather than 30-day deadlines.
| Pulling Stage | Example |
|---|---|
| 1 | Supported Hang |
| 2 | Scapular Pull-Up |
| 3 | Foot-Assisted Pull-Up or Chin-Up |
| 4 | Band-Assisted Pull-Up or Chin-Up |
| 5 | Controlled Negative |
| 6 | Full Pull-Up or Chin-Up |
| Dip Stage | Example |
|---|---|
| 1 | Support Hold |
| 2 | Foot-Assisted Dip |
| 3 | Partial Assisted Dip |
| 4 | Controlled Negative Dip |
| 5 | Full Dip |
A beginner does not need to reach a Full Pull-Up or Dip for the month to count as successful.
Related guide
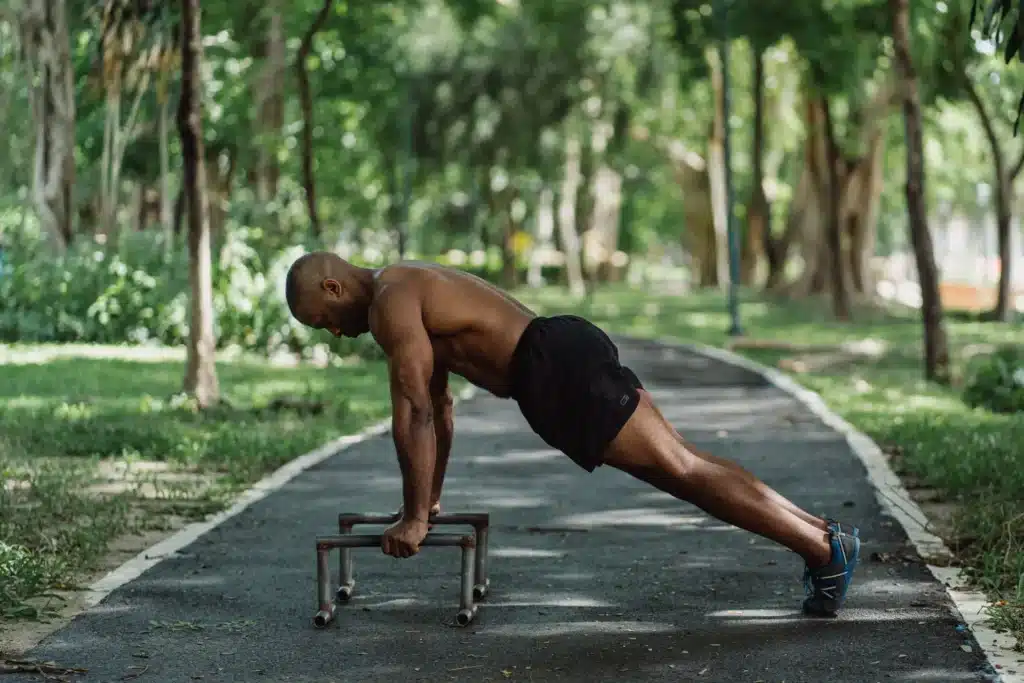
Use this beginner calisthenics progression chart to choose your starting level, know when to progress, hold or regress, and bridge harder variations.
Adjust the Plan to Your Daily Readiness
Before choosing one of the four training options, complete the safety check.
Safety Check Comes First
If you have new or worsening sharp pain, obvious swelling, a meaningful loss of normal movement, difficulty bearing weight, or discomfort that changes the way you move, this is not a choice between Train, Reduce, Active Recovery, and Rest.
Stop the workout and seek qualified medical guidance.
The following options are training-management choices for ordinary changes in energy, soreness, performance, and recovery. They are not methods for diagnosing or treating an injury.
Train
Complete the planned Workout A, B, or C when:
- your general energy is close to normal;
- the warm-up improves how you feel;
- your first exercise variation remains controlled;
- recent training fatigue is manageable.
Reduce
Use a reduced session when you can train but the normal workload is not appropriate.
Choose one adjustment:
- perform one fewer set;
- use an easier exercise variation;
- use the Minimum Session;
- reduce the repetition target;
- keep the movements but stop farther from fatigue.
Avoid changing every variable unless you have decided not to perform a formal workout.
Active Recovery
Active recovery may include:
- easy walking;
- comfortable mobility;
- gentle movement that does not become another workout;
- brief, low-effort skill positioning.
The activity should leave you feeling similar or better afterward. If it creates another meaningful training stimulus, it is no longer functioning as active recovery.
Low-effort balance or positioning practice is different from hard Handstand, Planche, L-Sit, or Front Lever training. High-effort skill work should be counted as training load.
Rest
Choose complete rest from formal training when:
- fatigue remains unusually high;
- several movement patterns perform worse;
- the warm-up does not improve readiness;
- sleep or other stress has substantially affected recovery;
- reducing the workout would still produce poor-quality movement.
A rest day does not require complete physical inactivity. It means you are not performing another formal strength session.
Related guide

Learn how many rest days beginners need for calisthenics, when to train or reduce, what counts as active recovery, and when complete rest is better.
What to Do When the Plan Does Not Go Perfectly
If You Miss a Workout
Do not combine two full workouts on the following day.
Resume with the missed workout and preserve the order:
Workout A → Workout B → Workout C
If this pushes the final assessment beyond the thirtieth calendar day, let the plan extend. Completing the intended sequence is more useful than compressing missed work into a shorter period.
Use the Minimum Session on a Busy Day
When time is limited, complete the first three exercises from the planned workout.
Perform one or two controlled sets of each. This preserves:
- one upper-body pattern;
- one lower-body pattern;
- one Pull or back-control pattern.
This Minimum Session also provides a practical 10–15-minute calisthenics option for beginners when a full workout is not realistic.
The Minimum Session is a fallback, not a reason to add more training later in the day.
If You Have No Pull-Up Bar
Use the floor-based back option listed in the tables, but keep its limitation clear.
Prone Towel Pulldowns, arm circles, and back extensions can train positioning and controlled muscular effort. They do not reproduce the loading or full function of an Australian Row, Chin-Up, or Pull-Up.
Once you have access to a safe low bar or pull-up bar, replace the existing back slot with the appropriate Row or assisted vertical-pull variation. Do not simply add it to the existing workout.
If You Also Run, Play Sports, or Lift Weights
Count other demanding activity as part of your total training load.
For example:
- hard running may affect the following leg session;
- gym pressing adds to the work performed by Push-Ups and Dips;
- climbing adds substantial pulling and grip work;
- frequent Handstand practice can add shoulder and wrist fatigue.
Adjust the next calisthenics session rather than pretending the activities are unrelated.
If You Return After a Break
Retest the exercise version that fits your current performance.
Previous experience may help you regain ability faster than a true beginner develops it for the first time, but your old training log does not guarantee that the old version is appropriate today.
Why Bodyweight Exercises Can Work in This Plan
Bodyweight exercises can provide meaningful resistance when their difficulty matches the person performing them.
In one five-week study involving 30 university students with advanced resistance-training experience, an elastic-band-resisted Push-Up condition and a Bench Press condition produced similar strength gains when the exercises were matched for high muscular demand.
The study did not examine beginners, this complete plan, or unassisted bodyweight Push-Ups, so it cannot prove the results a beginner will obtain here. Its narrower relevance is that a Push-Up can function as a progressive resistance exercise when its loading is appropriately adjusted. Review the Push-Up and Bench Press study.
The same principle explains why this plan changes leverage, support, and exercise variation instead of assuming that an unmodified bodyweight exercise has the same difficulty for everyone.
How to Measure Your 30-Day Results
Record a Day 1 Baseline
Before or during the first workout, record:
- the exercise variation;
- the number of controlled repetitions;
- the range of motion used;
- any support or equipment;
- the sets actually completed;
- a brief note about movement quality.
You do not need to test every exercise to failure. Choose a small number of repeatable checks, such as:
- your current Push-Up variation;
- Sit-to-Stand or Squat;
- your Row, Pull, or back-control variation;
- a controlled core exercise.
Repeat the Same Check on Day 30
Use the same:
- exercise variation;
- test order;
- repetition standard;
- rest period;
- equipment setup;
- range-of-motion rule.
If Day 30 happens to be an unusually poor day, record the result honestly and repeat the check after normal recovery. Do not erase the first result; note why you performed a confirmation test.
What Counts as Progress?
Progress can appear in several forms.
Movement Quality
You use better control, a more consistent range, or less compensation.
Controlled Repetitions
You complete more qualifying repetitions of the same movement under comparable conditions.
Exercise Difficulty
You perform an appropriately harder variation without losing the required standard.
Training Consistency
You complete more of the planned sessions than you previously managed.
Skill Learning
You improve a specific skill position or coordination task. Skill improvement is useful, but it should not automatically be interpreted as a general increase in strength.
Appearance
Photos or measurements may change, but they should be interpreted separately from performance.
What If You Look Almost the Same?
Looking similar after one month does not automatically mean the month failed.
First compare:
- movement quality;
- controlled repetitions;
- exercise variations;
- actual session completion;
- recovery;
- consistency.
Physical appearance can be affected by body weight, hydration, food intake, lighting, posture, camera distance, clothing, and a temporary training pump.
If you use progress photos, take them:
- at a similar time of day;
- in the same location;
- with similar lighting;
- at the same distance and angle;
- in a relaxed position;
- with a separate flexed photo only if both tests use one.
Do not use a single scale-weight change to claim that you gained muscle or lost fat.
Related guide

See what 30 day calisthenics before and after results can realistically show. Compare Day 1 and Day 30 performance, form, consistency and photos fairly.
Common Mistakes
1. Starting with a Variation That Is Too Difficult
A difficult exercise is not automatically a more effective exercise. Use a version that lets you practise the intended movement.
2. Taking Every Set to Failure
Repeated failure can add fatigue without being necessary for every strength or muscle-building result. Stop before movement quality breaks down.
3. Turning Three Training Days into Daily Hard Training
Daily movement is not the same as repeating a demanding full-body strength session every day.
4. Progressing Several Variables at Once
Do not simultaneously add sets, repetitions, and a harder variation. Change one main variable and observe the result.
5. Removing All Pulling Work
A home plan can easily become dominated by Push-Ups. Retain a back-control or Pull slot and upgrade it when safe equipment becomes available.
6. Treating One Poor Session as Lost Progress
Daily performance changes. Look for a repeated trend before changing the whole plan.
7. Doubling the Next Workout After a Missed Day
Resume the sequence. Do not turn one missed session into an unnecessary recovery problem.
8. Judging the Month from Photos Alone
Appearance is only one category of result. Compare performance, movement quality, and consistency separately.
What to Do After Day 30
Your next step should come from the month you actually completed.
Continue
Repeat the structure when:
- the current exercise versions still provide an appropriate challenge;
- your completion rate was good;
- movement quality is still improving;
- you do not yet meet the progression rules.
Adjust
Modify the plan when:
- you repeatedly missed sessions;
- the workload was too high or too low;
- a particular exercise never fit your ability or equipment;
- recovery remained unstable.
Change the smallest relevant variable first.
Progress
Progress selected exercises when:
- you repeatedly reach the top of the range;
- your movement remains controlled;
- the current version is no longer challenging;
- the next variation allows enough qualifying repetitions.
You do not need to upgrade every movement at the same time.
Frequently Asked Questions
Can I Learn Calisthenics in 30 Days?
You can learn foundational movements, improve exercise control, and establish a repeatable training habit. Thirty days is not enough to guarantee advanced skills such as a Handstand, Full Pull-Up, or Planche.
Is Three Calisthenics Workouts per Week Enough?
Three well-managed full-body sessions can be a practical starting structure for a beginner. The appropriate frequency also depends on session difficulty, other activity, and recovery.
Can I Do This Plan Without Equipment?
Yes. The base plan can be completed without gym equipment. However, completely equipment-free back exercises do not provide the same pulling stimulus as a safe Row, Chin-Up, or Pull-Up setup.
What If I Cannot Do a Push-Up or Pull-Up?
Use an easier variation. Wall and elevated Push-Ups can create a manageable pushing entry point. Pulling may begin with floor-based back control until you have access to a stable low bar, assistance setup, or pull-up bar.
Should I Train Calisthenics Every Day for Faster Results?
You may be physically active every day, but repeating hard full-body strength sessions every day is not required by this plan. Use the scheduled strength, active-recovery, and rest days for different purposes.
What Should I Do If I Miss Several Days?
Resume with the next uncompleted Workout A, B, or C. Do not double sessions or skip ahead simply to preserve the original calendar date.
When Should I Move to a Harder Exercise?
Progress after you reach the top of the target range with consistent movement quality during at least two sessions. If the next version is too difficult, use a bridge variation.
What Results Can a Beginner Realistically Expect After 30 Days?
The most defensible early results are improved movement familiarity, better control, more qualifying repetitions, a stronger training habit, and clearer knowledge of your current level. Visible physical change varies and cannot be promised.
Start with Workout A
Record the exercise versions you can perform today, complete Workout A without chasing failure, and preserve the A → B → C sequence throughout the month.
The purpose of this plan is not to force every beginner through identical repetitions. It is to remove the question of what to do next while still allowing the exercise level and daily workload to match the person doing the training.
After completing your first month, you can explore more beginner calisthenics training guides, progression resources, and home workout support from Calisthenics Forge.
Medical disclaimer: This article is intended for educational and informational purposes only. It is not intended as a substitute for medical advice. For health advice, contact a licensed healthcare provider.